
Welcome to our complete guide to brewing the healthiest coffee humanly possible!
There are three broad steps to getting the healthiest mug of coffee.
- Sourcing
- Roasting
- Brewing
We’ve obsessively done all we can to make sure steps 1 and 2 are on point, so now it’s over to you to hit it home by brewing the coffee in the healthiest possible way… with as much support from us as we can offer, shy of popping over to your kitchen to brew it for you.
First we'll share our top general tips which can be applied to all brewing methods before sharing individual brew guides for the most popular pieces of kit.
In this guide we will mostly use the below five pieces of kit as reference, but the principles outlined can be applied to any other radical new (or old) brewing devices you own.
- Cafetiere
- AeroPress
- Dripper (a.k.a. Filter or Pour Over)
- Espresso Machine
- Moka Pot
What does the science say?
Writing this guide was inspired by an awesome study published recently in the esteemed journal, aptly named, Antioxidants. It reviewed all previous research to determine what variables in brewing, roasting or other lead to higher levels of antioxidants in your cup. Naturally, when I saw this published I jumped for joy like a child who's just been given the latest Beano comic and dove right in.
First up roasting. They concluded:
"The degree of coffee bean roast has a significant impact on the extractable antioxidants, with darker roasts exhibiting a lower levels of antioxidant activity due to the decomposition of antioxidants during the roasting process."
This is awesome news as it gives weight to the reason why we roast our coffees lighter than most and never go darker than our Dark(ish) Roast - the perfect balance of retaining of coffees health benefits and developing a stronger, more chocolatey coffee taste.
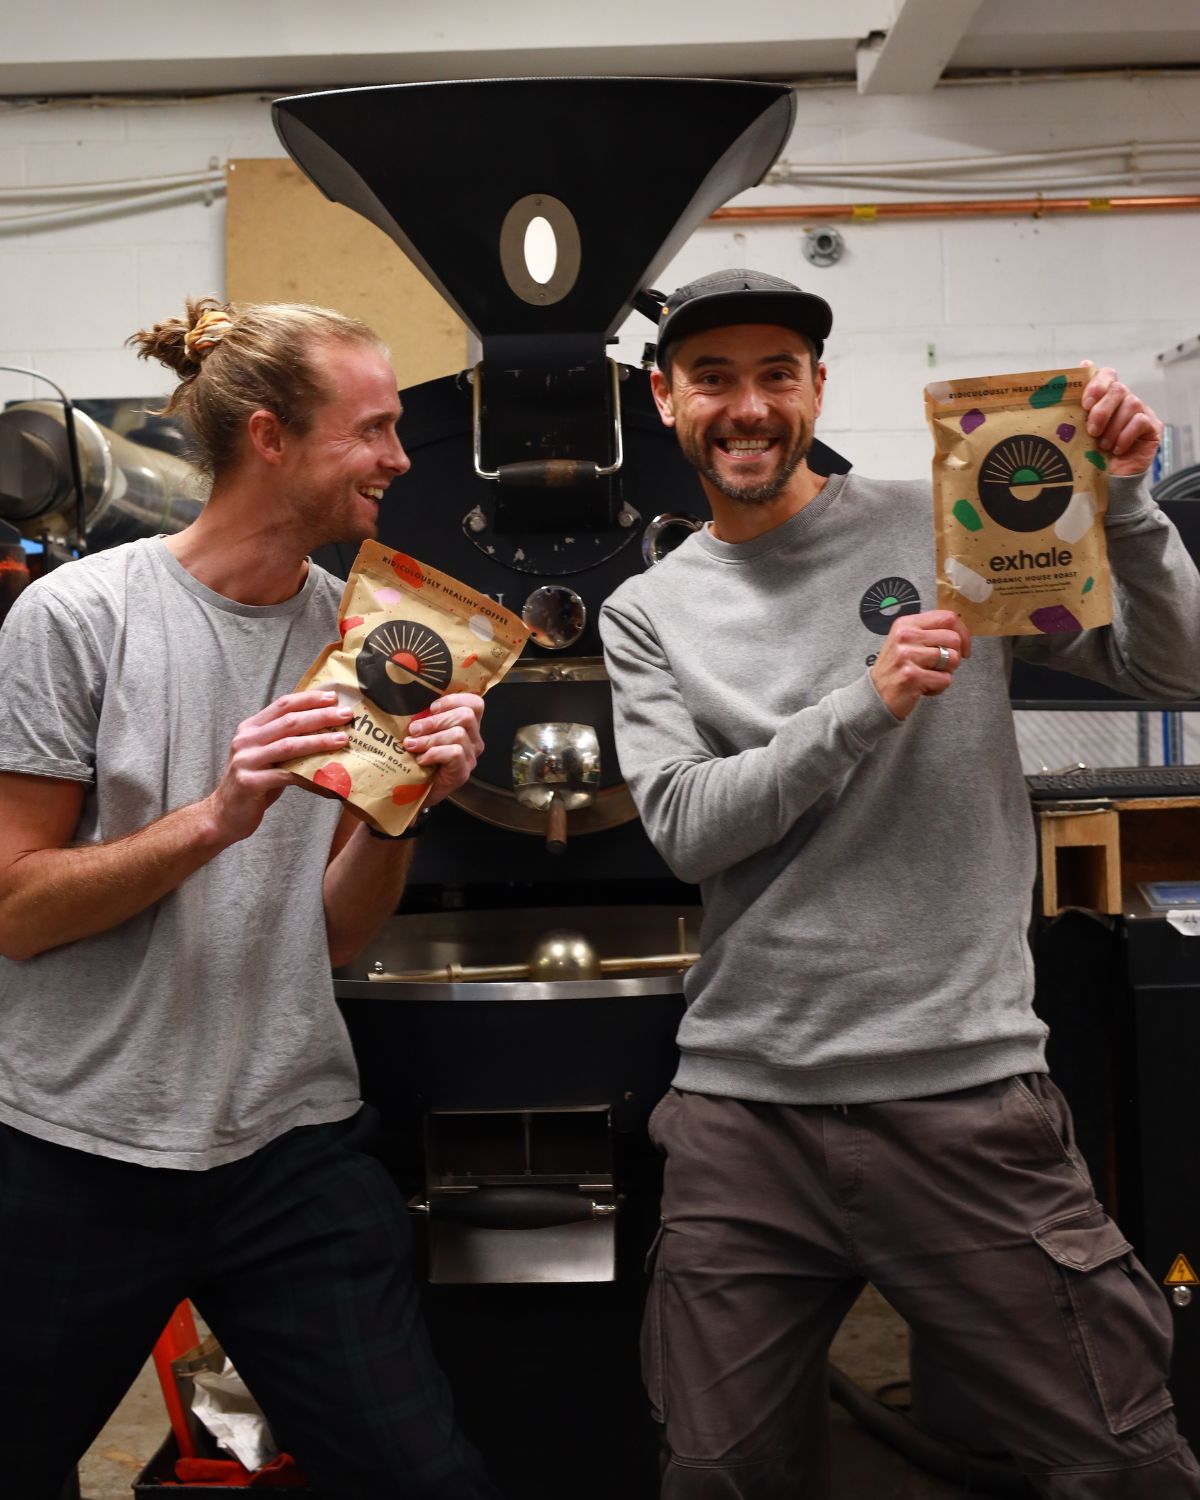
(excuse the cheesy picture of me and Kaspar in the Roastery!)
When roasting coffee the research is black and white: DON'T DARK ROAST! But brewing is a whole different story. I literally always get asked on podcasts what's the healthiest brewing method. And I always say the research is unclear which brew method is best with very contradicting results. But I do always give the same advice, which is again confirmed by the researchers in this study:
"Generally, a higher brewing temperature or longer brewing time yielded greater antioxidant activity."

To interpret into a tasty tangible takeaway - whatever brew method you choose, if you tweak it to use slightly hotter water, or leave it to steep a little longer, you'll likely get a healthier brew. Just don't push it too far or our delish beans could end up tasting bitter.
In this guide we will explore all of this and more, enjoy!
Tips to brew healthier coffee
-
Steel not Paper Filter
Our advice:
Use a steel filter instead of a paper filter.
If you’re using a cafetiere, espresso machine or moka pot you already tick this box by default.
If you use an AeroPress then buy a metal filter to use instead of the paper filters like the ones we offer. If you use a Dripper that uses a paper filter, perhaps a V60 or similar, switch to using a full steel filter like the Steel Reusable Coffee Filter by Zero Waste Club.
Shop Steel Dripper by Zero Waste Club

Why:
Steel filters are better for your health. Two of the healthiest compounds in coffee, cafestol and kahweol, are fat soluble and they dissolve in the oils that coffee contains. When you grind then brew coffee these oils are released but the problem is, paper filters are so dense that they remove most of these oils and so can remove up to 98% of the cafestol and kahweol. Whereas steel filters are the perfect size to let all of them through.
There is a caveat with this. The oils in coffee have been associated with a small, temporary increase in cholesterol so if high cholesterol is an issue for you perhaps you should consider using a paper filter. We wrote a full article reviewing the science on this so best read this first – Is coffee bad for cholesterol?
Paper filters are also usually bleached white and nobody wants bleech anywhere near their coffee. Finally, steel filters are reusable to better for the planet which is also important to us. All in all, three pretty compelling reasons to ditch the paper filters and use a steel one, which coincidentally was the title of another blog we wrote It’s time to ditch the paper filters.
-
Grind fresh
Our advice:
Grind your own coffee at home just before you brew it.
We offer both the Timemore Hand Grinder if you want to add a bit more ritual (and a workout) into your coffee routine; and a Wilfa Svart Electric Coffee Grinder for the easy option.
Shop Wilfa Svart Electric Grinder

Why:
I can’t recommend grinding your coffee at home (or on a mountain top) highly enough. It’s primarily coffee’s exposure to oxygen that makes it lose its freshness and begin to stale. Grinding coffee increases its surface area exposed to oxygen by thousands of times over speeding up staling and so should be done as close to drinking as possible.
The smell and taste of freshly ground coffee is incredible so don’t miss out. But fresh ground coffee is also healthier. We had Exhale coffee independently tested and after 6 weeks wholebean coffee had lost 12% of its healthiest compounds, but ground coffee lost much more at 20%.
Even if you don’t buy a grinder from us, make sure to get a grinder with conical burrs as opposed to blades. Blades literally smash the beans into pieces of different sizes. It’s a very uneven grind and this means the extraction is uneven. Conical burrs will create consistently sized grinds which will extract both flavour and healthy compounds more evenly.
-
Fresh Roasted
Our advice:
Buy only fresh roasted coffee. Generally, any coffee that involves a middle man, such as a shop or supermarket, won’t be as freshly roasted. Buying direct from your local coffee roaster… or online healthy coffee roaster… will get you the freshest roasted coffee available.
Why:
Just as fresh ground coffee tastes better and is healthier so is fresh roasted coffee. But note that coffee releases gasses for up to a week after its been roasted. If you’re using an espresso machine this can mess up the extraction so baristas usually recommend waiting 7-10 days after roasting before using beans. Otherwise you can use them straight away but it’s generally advised to let them sit for a few days at least after roasting before drinking for the best flavour.
You can read more about grinding coffee and how long coffee can be kept for after roasting in our article How to store coffee and tips to keep it fresher for longer.
-
Grind fine
Our advice:
Use as fine a grind size as your piece of kit (and your taste) allows.

See individual brew guides below. But for example, the usual recommendation for a cafetiere is a coarse grind size. We recommend a medium grind instead. With an AeroPress, dripper or a moka pot relatively fine ground coffee works well. If you use an espresso machine you already tick this box as is requires a fine ground coffee as a minimum.
But note, a finer grind size may produce a more bitter cup of coffee so going too fine isn’t recommended. Also if you go too fine it may not work in your chosen brewer – for example using a fine ground coffee in a cafetiere will clog it up and lead to a very gritty cuppa!
Why:
Extracting coffee healthiest compounds, such as polyphenols, is a chemical reaction and just like any chemical reaction it's controllable by the same few variables.
If you want to speed up that reaction to extract the polyphenols from coffee (the extraction reaction as we've ingeniously nicknamed it), there are a few things you can tweak to give you a healthier cup of coffee
One of those is the grind size. You can use a finer grind size, increasing the surface area of the coffee grounds for a more efficient extraction reaction.
-
Steep for longer
Our advice:
Allow the coffee to steep for as long as your taste will allow.
See individual brew guides below. But for example, the usual recommendation for a cafetiere is a 4 minute steep time. We recommend 5 minutes. Note that if you leave any brewer too long to steep it will make for a more bitter brew so find your own happy medium.

Why:
For the same reasons as the grind size in point (4), if the coffee grounds are in contact with the hot water for longer then more polyphenols can be extracted. Up to a point, of course, when they’re all extracted (as yet undetermined, watch this space!). So, a longer steep time will mean more time for the extraction reaction to take place and so lead to a healthier cup. It will also lead to a more bitter tasting cup of coffee if left too long so it’s a balancing act and you should experiment yourself at home.
-
More pressure
Our advice:
Use more pressure when possible.
This isn’t really relevant to most brewers other than AeroPress and perhaps espresso.
When using an AeroPress using a more fine ground coffee will make it more difficult for the water to pass through the grounds so when you plunge there will be much more pressure.
Why:
As with points (4) and (5) more pressure also improves the efficiency or the extraction reaction and means more of coffees healthiest compounds are extracted. Just be careful with this one when using an AeroPress, sat on a cup, while applying a lot of pressure.
Shop AeroPress with Metal Filter

-
Hotter water temperature
Our advice:
Use hotter water.
This is a tricky one as too hot a temperature may over extract some nasty tasting components of coffee. Some call this ‘scalding’ or ‘burning’ the grounds but neither are technically true (coffee beans are roasted at over 200C so hot water can’t really burn them!). It will just produce a coffee taste that some don’t like. But some do! Again, experiment and find your own happy place but air on the side of a hotter water temperature. Some methods, like Turkish coffee, boil the coffee grounds so don’t be afraid to push it.
This is easier to play with using a cafetiere or dripper. I wouldn’t use too, too hot a water temp in an AeroPress since it’s plastic and I’m always suspicious of hot water in plastic.
Why:
Increasing the temperature is another way to improve the efficiency of any chemical reaction. So as with points (4) to (6) above, a hotter water temperature will generally lead to a healthier cup of coffee.
-
Store coffee wisely
Our advice:
Storing your coffee in an Airscape is genuinely the best option all around, that’s why we offer them and only them. We sell Exhale branded Black Airscapes and White Airscapes. The pouch Exhale coffee comes in is fine for a few weeks, or longer if you buy beans.
Shop Exhale x Airscape Coffee Storage Container - Black
Shop Exhale x Airscape Coffee Storage Container - White

The basic principles of coffee storage are to keep it in a cool, dark, dry place in a container that’s well sealed to keep out any possible contaminants. Avoid heat sources like an oven or direct sunlight. An opaque container in a dark utility room or cupboard is ideal. These are the non-negotiables! As is not storing your coffee in the fridge! But storing coffee in the freezer can be ok if done correctly.
For our full advice on how to store coffee read our article How to store coffee and tips to keep it fresher for longer
Why:
Coffee’s healthiest compounds start to degrade upon contact with oxygen in the air or UV rays from the sun. See point (2) above for some stats on the speed they degrade. But it’s as simple as that. Keep coffee out of direct sunlight and in as air-free and air-tight a container as possible to slow it’s staling and keep it fresher and healthier for longer.
-
Show some gratitude!
Our advice:
Take a moment while your coffee brews to reflect on all the incredible things that happen to turn a humble coffee bean, growing inside a cherry on a tree in Colombia, into that delicious brew you’re waiting for.

This works especially well if using a cafetiere and you have to wait 5 minutes while it steeps. But it’s less effective when using an espresso machine as it’s usually over in around 25 seconds. Even if arguably you have more to be grateful for as espresso machines are pretty neat pieces of kit and whoever invented them is a genius.
Why:
You brain releases cortisol when stressed or anxious. Caffeine can also cause a cortisol spike in some people (although this spike isn’t an issue in 99% of coffee drinkers who are habituated to caffeine).
Feelings of gratitude can help your body regulate cortisol levels and so reducing any negative effects some people feel. Gratitude also triggers your brain to release feel good neurotransmitters in the brain including serotonin and dopamine which make you happy and act as a natural antidepressant.
So all in all, what have you got to lose!
Bonus Tip: Believe!
Our advice:
Drink your coffee and fully commit to believing it’s turning you into a super human, Herculean, wellness machine.
Why:
Your mind can be a powerful healing tool if you allow it. My evidence for this lies in the fact that the placebo effect really works. Science has now categorically proven that the placebo affect is real and under the right circumstances can be just as effective as traditional treatments. So don’t underestimate the power of thinking positively about your coffee!
Quoting from Harvard Health Publishing by the Harvard Medical School:
How placebos work is still not quite understood, but it involves a complex neurobiological reaction that includes everything from increases in feel-good neurotransmitters, like endorphins and dopamine, to greater activity in certain brain regions linked to moods, emotional reactions, and self-awareness. All of it can have therapeutic benefit. "The placebo effect is a way for your brain to tell the body what it needs to feel better," says Professor Ted Kaptchuk of Harvard-affiliated Beth Israel Deaconess Medical Center, whose research focuses on the placebo effect.

So to conclude, Exhale coffee undergoes 9 different independent lab tests to ensure it’s packed full of ridiculously healthy polyphenols, with antioxidant power equivalent to 55 oranges or 12 punnets of blueberries. That’s phenomenal, there’s no doubt that will be doing your body a whole world of good. But if you also fully commit to believing it is, then your brain will make sure it is!
Exhale’s healthy coffee brew guides
Without further ado let’s dive into our brew guides!
For the last 3 years we've recommended using our medium ground coffee for a cafetiere, AeroPress, dripper and Moka Pot. After re-testing ourselves and also with the expert baristas at the roastery we've concluded that some of these can produce a delicious tasting and potentially even healthier (se point 4 above) brew if you use a fine ground coffee instead.
CAFETIERE
Ah the timeless cafetiere, a.k.a. French Press. The godfather of home brewing. Stylishly designed in the 1950's, it's a fave in Exhale HQ for its simplicity... and the fact you can get a 1L version and brew for 4 people at once!
We did our antioxidant lab testing in a cafetiere so if you want 55 oranges worth of antioxidants in your coffee this way guarantees it.
We love it because it's super simple to use and produces a brew with plenty of body and 'mouthfeel' as the pro's call it.
When brewing with a cafetiere, as general rule of thumb, use a ratio of 60g of medium ground coffee to 1L of water.
Medium is still the best grind size for a cafetiere. Fine ground coffee clogs the plunger, makes it too difficult to plunge and finer grinds pass through into your coffee making it a bit gritty.
Shop Exhale x Milu Stainless Steel French Press

Method:
- For 1 cup add 15-17g of medium ground coffee (3 heaped tsp) to a small cafetiere
- Fill with hot water 30 seconds off the boil
- Stir after 30 seconds
- Plunge after a total of 5 minutes (or you can sneak in an extra 30-60 seconds for a stronger brew) – Simple.
AEROPRESS:
The AeroPress is a revolutionary way to make perfect coffee in just 1 minute. And it's really simple to use.
It's a favourite for us because you can make perfect coffee at home or away - it's virtually indestructible so you can chuck it in your backpack or suitcase.
Bundle it with a steel filter so it's better for you and better for the planet. Read why in our blog It's time to ditch the paper filters.
Because it uses a combination of pressure and steeping, the flavour has some of the intensity of an espresso but gives you a larger sized cup.
Fine ground is the best to use in an AeroPress, we've changed our recommendation! If you use a metal filter then this is a no-brainer. If you use a paper filter be really careful when plunging as the pressure will be much greater with fine ground coffee. But the result is a much stronger coffee, full of flavour. The fine grind size and extra pressure would also make for a healthier cup of coffee.
Shop AeroPress with Metal Filter

Method:
- Add 17g fine ground coffee to an inverted (upside down) AeroPress
- Fill to within 1cm of the top with hot water, 2 minutes off the boil
- Stir gently for 10 seconds
- Leave to steep for 30-60 seconds
- Put the lid on with a steel filter in it, screw tight
- Quickly flip it over on to the top of a cup
- Plunge slowly over about 20 seconds
DRIPPER / FILTER / POUR OVER:
The team at Zero Waste Club have created a reusable steel coffee filter that not only makes a deliciously smooth brew, but is better for the environment too.
For us, using a steel filter over paper is key as it lets in more of those healthy coffee compounds. And it’s a total win-win for the planet too, as it means no more wasting paper filters. They're also really easy to clean and dishwasher safe.
Fine ground is best when using a dripper. If the water is too slow to pass through then you can give it a gentle stir half way through. Aiming for almost all water to have dripped through by 2.5 minutes. We've been shocked by how good the coffee is when brewed through a steel filter using fine ground coffee. It tastes really strong and full bodied but without any of the negatives you would usually get from strong coffee.
Shop Steel Dripper by Zero Waste Club

The steel dripper is a coffee geek's dream! There are an infinite number of variables you can play with giving you the ultimate control over your brew. Trial and error is part of the fun, but here's how we roll:
Version 1 – Kirsty and Alex update for 2024:
- Sit your dripper on top of a mug
- Add 3 heaped tsp of fine ground coffee (17g if using scales)
- Shake a little to flatten then press a dimple into the middle of the grounds
- Pour in a little hot water, 30s off the boil (50g)
- Leave for 30s to 'bloom'
- Slowly pour in more hot water, wetting all the grounds, until about 1cm from the rim of the dripper (an additional 225ml)
- After 1.5 minutes give it a single stir, getting right to the bottom.
- After 2 to 2.5 minutes total remove the dripper from the mug, enjoy!
Version 2 – Added by the baristas at Press Roastery:
- Sit your dripper on top of a mug
- Add 16g of fine ground coffee
- Pour in 30g hot water, at 96C.
- Leave for 30s to 'bloom'
- Slowly pour to 130g total hot water, wetting all the grounds.
- Wait another 30s.
- Pour to 250g total hot water.
- Wait until it fully drips (around 2.5 minutes).

MOKA POT:
No camping trip is complete without a moka pot a.k.a. stove top. It’s been around for over 100 years and is a true, iconic, Italian masterpiece. But unfortunately, it’s become less popular recently as more people have opted for trendier brewing methods like a home espresso machine or AeroPress.
For us, it still has it’s place as it produces a strong brew, full of flavour. It really packs a punch!
Our top tip is to leave the lid open when brewing. If you don’t, it’s easy to forget it and you get a really burnt tasting brew. Leaving it open means you will hear or see it shouting and spitting at you when the action begins!
Method:
- Add fine ground coffee to about 1-2mm from the rim of the basket.
- Add hot water to the chamber, filling to just below the valve.
- Place the basket into the chamber and screw on the top half (holding with a towel as it will be hot!).
- Sit the moka pot on your hob, leaving the lid open.
- When you hear or see water bubbling out close the lid.
- The very second the top half has filled with water remove from the heat and pour.

ESPRESSO MACHINE
Home espresso machines have taken over our kitchens! Since lockdown they’ve become the number one must have kitchen gadget.
There are so many different ones on the market and all work slightly differently so you have to ‘dial in’ your method on your own machine. In layman’s terms, this means prepare yourself waste a ton of coffee through trial and error while you hone your skills!
Our fave is the Sage Bambino. You can also get them with a built in grinder, but the problem with these is that if you also use other brewing methods which require different grind sizes it’s a pain. Also if you have multiple different coffees (for example if you buy our regular coffee and our decaf) it’s pretty unusable.

Method:
- Add 18g fine ground coffee to the basket.
- Tap the side to level it out then tamp firmly.
- Extract until you reach 40g out.
- Total extraction should take 25 to 30 seconds.
- Enjoy!
That's all for now. This 'complete guide' is ever evolving so if I've missed anything let me know and I can update it.
Happy brewing!
Al x
4 comments
Jane
I have a filter that sits inside a mug. Do you have any tips for that? It’s not metal or paper. Thanks team!
Matt
Hi and thanks for (yet another) great article. I have recently come across the Wacao products and wondering if you have any experience of them. I’m considering investing in a Nanopresso, and would love to hear your thoughts if you have.
Matt
Kalina
Absolutely loved this guide! So helpful to have it all in one place and I am now inspired to try other brewing methods that I haven’t tried before.
Angela Bedson
Hi! Thanks for the great tips and guide to coffee brewing. It would be really useful to have this guide as a print-out that I could have in a kitchen drawer x
Leave a comment
All comments are moderated before being published.
This site is protected by reCAPTCHA and the Google Privacy Policy and Terms of Service apply.